How to Roast Peanuts at Home: Oven, Temperature, and Time
If you’ve ever bought a jar of roasted peanuts at the store and thought, I wonder if I can just do this myself — you absolutely can, and the results are better than anything off a shelf. “Raw peanuts” (peanuts that have been dried but not cooked yet — they look pale, almost ivory, and taste a little grassy straight out of the bag) are inexpensive, easy to find in bulk, and they roast beautifully in a regular home oven. The process takes less than half an hour of active attention. What you get is a peanut that’s fresher, crunchier, and more flavorful than its store-bought equivalent — because the oils haven’t had weeks to go stale since roasting.
This guide covers every common scenario: peanuts still in the shell, shelled peanuts with their papery red skins on (called “redskins”), and shelled peanuts with the skins already removed (called “blanched”). I’ll give you exact temperatures and times, walk you through the one doneness test that actually works, and tell you how to season them so the salt sticks. By the end, you’ll know exactly what to do with whatever bag of raw peanuts you’ve got.
First, Know What Kind of Peanuts You’re Starting With
This is the single most important thing to get right before you turn on the oven, because different forms of raw peanut roast at different speeds and respond differently to heat.
In-shell peanuts (the whole peanut inside its tan, papery shell) roast more slowly because the shell acts as insulation. They’re forgiving — it’s hard to burn them — and the finished peanut has a slightly steamed, nutty sweetness that’s different from a shelled roast.
Shelled redskin peanuts (the shell removed, but the thin red papery skin — technically called the “seed coat” — still on) roast faster than in-shell, and the skin adds a faint bitterness that some people love in snacking peanuts and that most serious brittle-makers actually prefer for the flavor depth it adds. Virginia-type and Runner-type peanuts are most common in this form. (Virginia peanuts are the large, oval ones; Runners are smaller and more uniform in size — they’re the variety behind most commercial peanut butter.)
Blanched peanuts (shell off, red skin off, leaving a clean cream-colored nut) roast the fastest and most evenly. They’re the go-to for homemade peanut butter, granola, and candy recipes where you want a clean, mild peanut flavor without any bitterness from the skin. Spanish peanuts — a smaller, rounder variety with a reddish-brown skin — are often sold in blanched form and are a classic choice for peanut brittle.
Quick rule of thumb: If the bag says “raw” and the peanuts look pale and feel a little waxy, you’re in the right place. If they smell nutty and taste toasty already, they’ve been pre-roasted and you don’t need this guide.
Oven Temperatures and Times: The Full Breakdown
Here’s where most home guides get vague. I’m going to be specific, because specific is what you actually need.
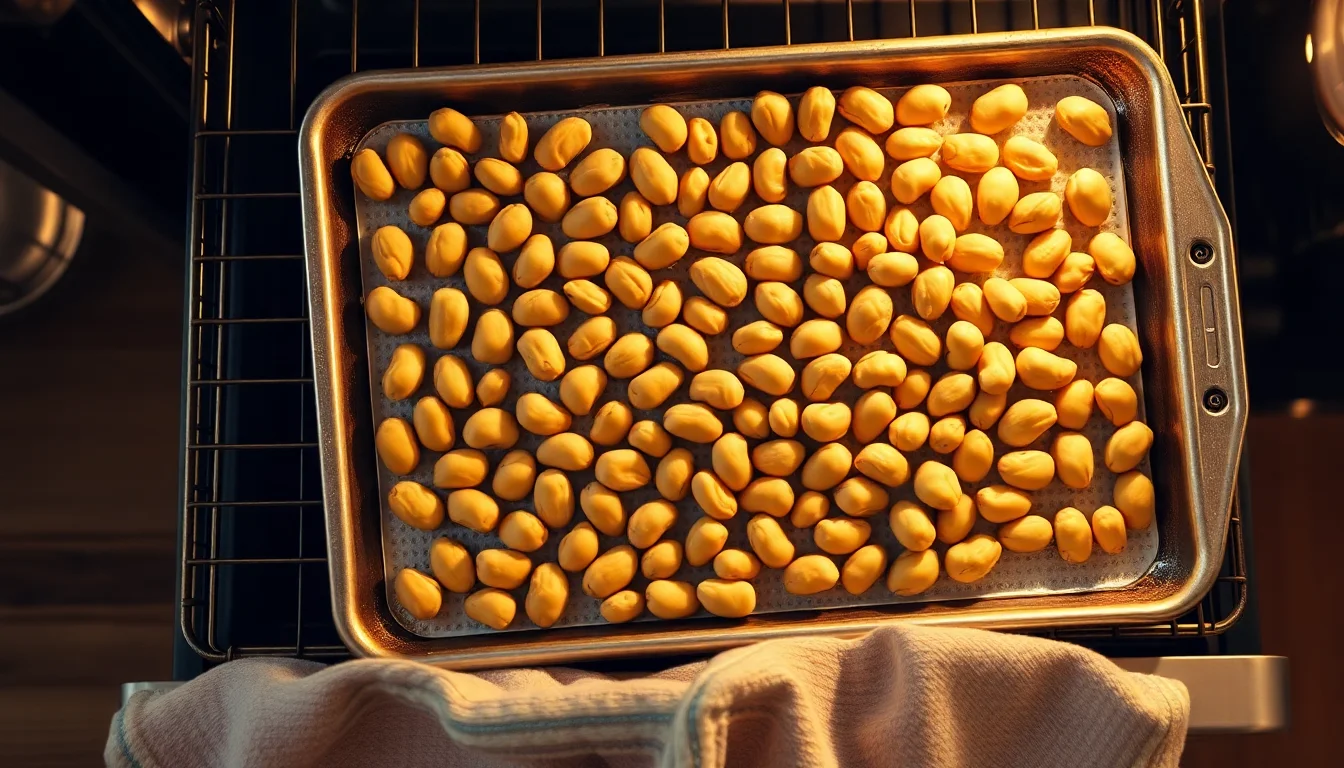
Preheat your oven fully before the peanuts go in. A partially-heated oven leads to uneven roasting and unreliable times. Use a baking sheet with a rim (a standard half-sheet pan works perfectly), and spread the peanuts in a single layer — no piling, no deep layers, because the ones on top will roast and the ones on the bottom will steam.
By the Numbers: Roasting Reference
| Peanut Type | Oven Temp | Time Range | Stir? |
|---|---|---|---|
| In-shell | 350 °F (175 °C) | 20–25 min | Every 10 min |
| Shelled redskin | 350 °F (175 °C) | 15–20 min | Every 7 min |
| Blanched (shelled, no skin) | 325 °F (165 °C) | 12–18 min | Every 5 min |
A few things to know about that table:
Blanched peanuts get the lower temperature. Without the skin as a buffer, they brown faster and can go from perfectly golden to bitter in under two minutes if your oven runs hot. 325 °F gives you more control.
Time ranges reflect real oven variation. According to the North Carolina State Extension’s home roasting guidance, oven calibration can vary by 25 °F or more from what the dial reads. If your oven runs hot, start checking at the early end of each range. If it runs cool, give it the full time.
Thin pans roast faster than heavy ones. A lightweight aluminum sheet pan transfers heat more aggressively than a thick stoneware dish. If you’re using a heavy pan, add 2–3 minutes to your estimate.
The Doneness Test That Actually Works
Don’t go by color alone — peanuts continue cooking from residual heat after they leave the oven, and a peanut that looks light golden on the pan will look and taste perfect two minutes later on the cooling rack. Conversely, a peanut that looks perfect on the pan will taste slightly bitter once it’s cooled down.
Here’s the test I use: About two minutes before the low end of your time range, pull the pan out and let it sit on the counter for 60 seconds. Then crack one peanut open (or cut a shelled one in half) and look at the interior. You want to see:
- A cross-section that’s a uniform light tan to golden-brown all the way through — not white or pale in the center
- A dry, slightly crumbly texture, not waxy or dense
- A smell that’s toasty and nutty, not green or raw
If the center is still pale and waxy, return the pan for another 3–5 minutes and test again. If it looks golden but you’re not sure, pull it — you can always toast a shade more, but you can’t un-burn a batch.
The cooling trap: Spread finished peanuts immediately onto a clean dry towel or a second sheet pan. Do not leave them on the hot pan — they’ll keep cooking and you’ll overshoot your target. This is the single mistake I made the most when I first started roasting for my candy work, and it cost me more batches than I want to admit.
How to Salt and Season Them
For in-shell peanuts: Salt barely penetrates the shell during dry roasting. For a properly salted in-shell peanut, soak them in a saltwater brine (about 2 tablespoons of kosher salt per quart of water) for 8–12 hours before roasting, then pat them dry and roast as normal. The salt soaks into the shell and seasons the nut from the outside in. This is the traditional Virginia-style method, and it works beautifully.
For shelled peanuts (redskin or blanched): Toss them with a very light coating of neutral oil — about 1 teaspoon of peanut oil or vegetable oil per pound of peanuts — before roasting. The oil acts as a carrier that helps salt adhere and promotes even browning. After roasting, while the peanuts are still hot, toss them with fine sea salt or popcorn salt (finely ground salt sticks better than coarse kosher salt on a bare nut). Start with about ½ teaspoon per pound and adjust to taste.
Flavor variations worth trying:
- Honey roasted: Toss blanched peanuts in a mixture of 1 tablespoon honey + 1 tsp oil + ¼ tsp salt per pound before roasting. Watch them closely — the sugar burns faster than plain nuts.
- Spiced: Add smoked paprika, garlic powder, or cayenne to your oil-salt toss before roasting.
- Dry roasted (no oil): Perfectly fine for blanched peanuts going straight into peanut butter — the blender doesn’t care about texture.
The National Peanut Board notes that peanuts are roughly 50% fat by weight, mostly unsaturated, which is why they roast so well with minimal added oil — they essentially fry in their own oils as they heat.
What to Do With Them After Roasting
Eating and snacking: Let them cool fully before storing — about 20 minutes. Store in an airtight container at room temperature for up to 2 weeks, or in the freezer for up to 6 months. Roasted peanuts go stale faster than raw ones because the exposed oils oxidize; that’s why freshly roasted always tastes better.
Peanut butter: Let blanched roasted peanuts cool to room temperature, then blend in a food processor for 3–5 minutes, scraping the sides, until completely smooth. No oil needed — peanuts have enough natural fat to form a paste on their own. Salt to taste. This is genuinely one of the best things you can make in your kitchen for under $5 a batch.
Brittle and candy: For brittle, you want raw Spanish peanuts added directly to the hot sugar syrup in the final stages of cooking — they finish roasting in the caramel. But if you’re making a recipe that calls for already-roasted peanuts, a light roast (not dark) gives you the best result. The sugar will add its own toasty notes; you don’t want the peanuts competing with double-brown flavor. See our Peanut Brittle guide for the full breakdown.
Granola and baking: Roughly chop roasted peanuts and add them in the last 10 minutes of granola baking so they don’t over-toast. In cookies and bars, roasted peanuts hold up better to a second round of heat than raw ones.
What to Buy: Raw Peanuts for Home Roasting
For home roasting, you want raw shelled peanuts (either redskin or blanched, depending on your use — redskin for snacking, blanched for peanut butter and candy). In-shell raw peanuts are also excellent if you want the brine-and-roast experience.
A few size guidelines before you shop:
- 2 lb bag: Right for a single batch of snacking peanuts or one recipe test
- 5 lb bag: Good if you’re making peanut butter regularly or doing a small candy project
- 25 lb bag: Where the price per pound drops significantly — worth it if you’re cooking for a crowd, doing a fundraiser, or running through peanuts weekly
Not sure how many pounds you actually need for your project? Our Pack-Size Cheat Sheet gives you quick estimates by recipe and event size — from a single batch of brittle to a 50-person wedding peanut bar.
→ Shop Raw Redskin Peanuts, 2 lb → Shop Raw Blanched Peanuts, 5 lb → Shop Raw Peanuts in Bulk, 25 lb